


SPOTLIGHT A RESOURCE
A frequent concern voiced by teachers is the pacing of instruction. In an ideal world, teachers would have enough time to closely study all the modules of their grade level well in advance of the school year and collaborate with colleagues on a detailed plan of implementation. To support the realistic schedules of educators, the Pacing and Preparation Guides are intended to provide an efficient and systematic plan of attack for implementation.
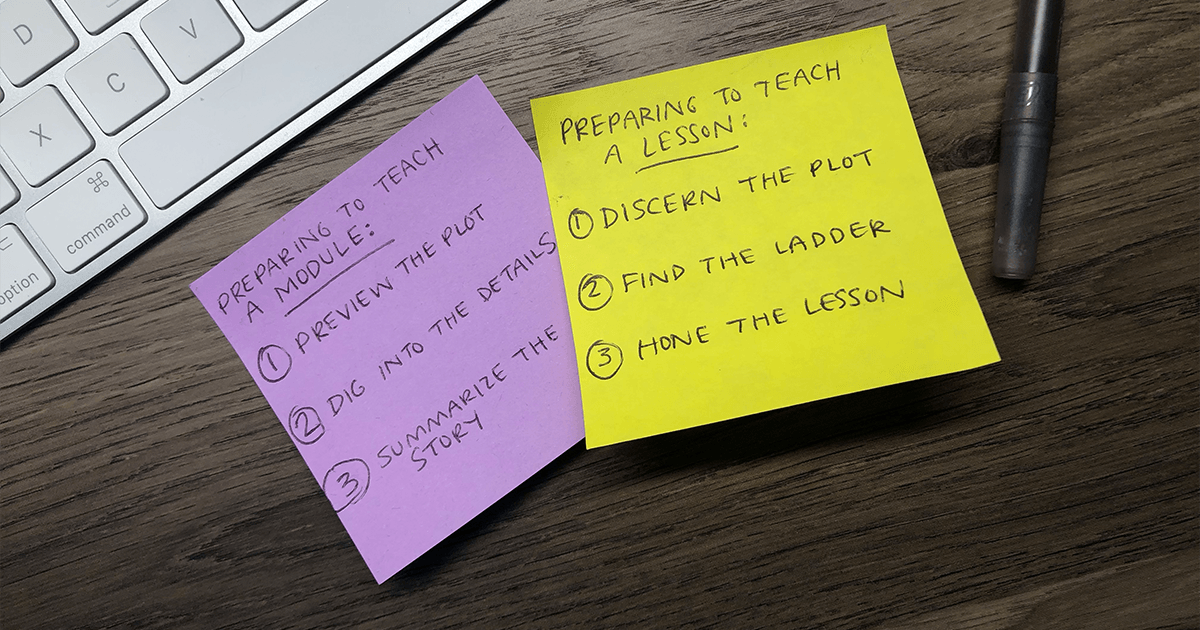
PREPARING TO TEACH A MODULE
At the opening of this guide, each module of A Story of Units (or Ratios, or Functions) is likened to a chapter of a book. Just as we follow the plot of a story, how it builds and how each scene impacts what happens next, so we see a parallel development in each module. The process in this guide will help you establish the ‘plot’ of the module; it will stage how the math progresses in the module. There are three major steps:
STEP 1 — PREVIEW THE PLOT
- Read the Table of Contents. This is an initial snapshot of the module; it provides a quick view of what is happening in the module from beginning to end.
- Preview the module’s Exit Tickets. This provides a tangible sense of what students are intended to achieve by the close of each lesson.
STEP 2 — DIG INTO THE DETAILS.
- In this step, start by looking a broad overview and slowly narrow your study to specific objectives.
- Read the Module Overview. The Module Overview begins to fill in the outline formed from reading the Table of Contents. The idea is to refer to the lessons and Topic Overviews within a Module as you read and make sense of how the content and instructional strategies are framed.
- Read the Student Objectives, which are more refined goals for each lesson
STEP 3 — SUMMARIZE THE STORY.
- To be completely familiar with where students are headed in the module, the Mid- and End-of-Module Assessments should now be completed. As each problem is solved, refer, again, to the lessons in order to analyze the intent of the problems and consider how students will solve them.
Without having read every line of every lesson, you will have an understanding of the major work, including major content, strategies, learning objectives, and ultimately, the big picture of the module.
PREPARING TO TEACH A LESSON
When getting ready to teach the lessons, follow the steps outlined in this guide, which go beyond a straight-through reading of the lesson.
STEP 1 — DISCERN THE PLOT
In order to get a feel for where the lesson falls in the scope of the Module, quickly review the Table of Contents of the module, followed by the appropriate Topic Overview, the Student Outcome, and Exit Ticket of each lesson of the topic. Finally, review the Mid- or End-of-Module assessment that follows the lesson.
STEP 2 — FIND THE LADDER
The ladder represents the sequence of skills or learning the student must have to successfully complete the lesson. With an understanding of where the lesson fits in within the module, now complete all questions in the lesson, including the Closing questions. Observe how the successive problems are changing and what each new level of complexity to the question implies in terms of student thinking. Note these changes; each new level of complexity is a rung on the ladder.
STEP 3 — HONE THE LESSON
With a thorough understanding of the lesson, it can now be tailored to suit your class. Anticipate where students will struggle and categorize portions of the lesson and questions as ‘Must Do’ (most students can do), ‘Could Do’ (students with greater understanding and fluency can do), and ‘Challenge!’ (students ready for more advanced work). These planned distinctions will allow you to pivot your class, or help target work for specific students. Though questions are being cherry-picked for each category, the goal is to pick them in such a way that keeps the story of the lesson in tact. For example, a selection should keep a similar mix of conceptual, abstract, and application types of problems as found in the whole lesson. The following chart is included in the guide to help determine the customization needed for remedial work:

SUGGESTIONS FOR CONSOLIDATION OR OMISSIONS
For grade levels where substantially more of the 180-day school year is needed for instruction, a final section of the Pacing and Preparation Guide has been dedicated to suggestions on how to adjust the curriculum in the situation that teachers need to reduce the number of instructional days. Suggestions of where to modify each module of the grade level are made based on the Student Objectives, the work of each lesson, and so that the overall intention of the module is unaltered.
All of the Pacing and Preparation Guides can be found on the Great Minds website. We can’t always get the time we want for planning ahead, but hopefully, these materials make the time available for preparation as effective as possible.
This post is by Pia Mohsen, a former teacher, who is a Grade 10 writer for the Eureka Math curriculum.
© Great Minds 2016

Pia Mohsen
Pia graduated from the University of Pennsylvania with a Bachelor of Arts in Economics and a minor in Psychology. She taught high school math at the New York Harbor School for seven years through the New York City Teaching Fellows program. After moving to Philadelphia, she joined the Eureka Math team and helped write the first edition of Geometry for the curriculum. Outside of work, Pia enjoys getting crafty by making cards and finding new corners of Philadelphia to explore with her husband and two boys.
Topics: Implementation Support

Get the Latest Great Minds Updates
Stay informed of simple yet crucial implementation support tips, curriculum updates, new resources, professional development opportunities, and more for math, science, and ELA.